MATERIALS
As stated in 'plan and design' I decided to go with aluminum for strength and stability and cosmetics. 1/4" thick aluminum plate was the greatest thickness that the metal bender could handle, so that's what I got. In retrospect, it may have been a bit of overkill. I might have gone with 3/16", the quarter inch stuff is really stout.
After checking several online vendors, I went with Online Metals. They had a nice guide on choosing the correct aluminum alloy for your project, and had no problem serving the small hobbyist with little custom orders.
I selected 5052-H32 alloy for strength and workability, one sheet 24" x 24" x 0.249"....$73.73
For the mount arms I selected
6061-T6 1" square aluminum tubing. It was available in wall thicknesses of
0.0265" or 0.125"
(1/8" or1/16"). Of course I went with the thick wall stuff.
Two tubes, 5 feet in length$11.38 each...$22.76
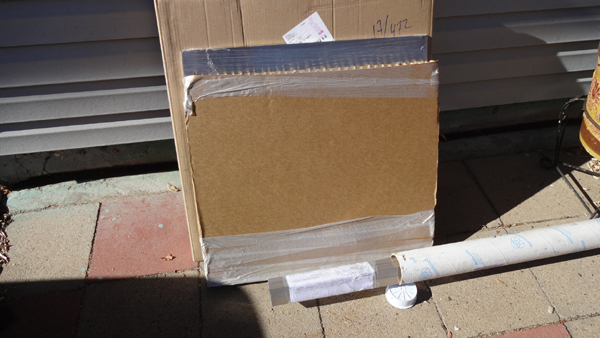
I cost over $50 to get this metal packed and shipped from a Seattle order center. That seemed a little high to me at the time, but I didn't stop to think about the weight of this amount of metal. It was very professionally packaged in two pieces, a large flat carton for the plate and a sturdy mailing tube for the square tubing.
In a perfect world, the four square feet of aluminum plate should have been enough to see the project through. But there were mistakes and do-overs, so I ended up having to find some more metal. This time I started trying to line up local sources. I found out that most of the big metal suppliers won't touch hobbyist orders. One them was kind enough to recommend a recycling company about an hour from my house that might be able to help. I gave them a call and they said c'mon down. This outfit was in the business of recycling scrap aluminum from area fabrication shops, and they had a nice selection of odds and ends aluminum plate. I selected what I thought I might need and paid $3.00 a pound....$27 for nine pounds of nice metal. I'm not certain what the alloy type was, but it seems like solid quality stuff.
My plans called for lots of little hardware, some of it turned out to be a little hard to track down. The big connector hardware: hex nuts and bolts, carriage bolts, nylon locking nuts, metal washers, were mostly purchased locally at hardware and home improvement stores. The nylon bushings, flange bearings, washers and tensioning knobs were purchased from online suppliers listed below:
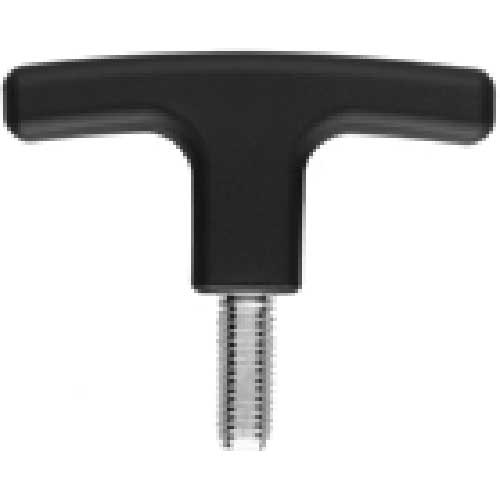
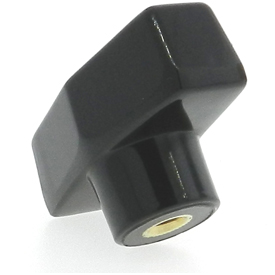
I shopped knobs at Global Industrial Supply. The plan called for T-bar knobs for tension adjustment at 5 points, and a threaded stud T-bar to secure the binoculars to the cradle. I spent $27.00 on knobs.
 |
 |
| Winco T-Bar Knob (1 ea.)
1/4"-20 tpi Global Industrial Part #3T75BW0 |
T-Bar Knob (5 ea.)
Tapped 5/16"-18 tpi Global Industrial Part #B1504757 |
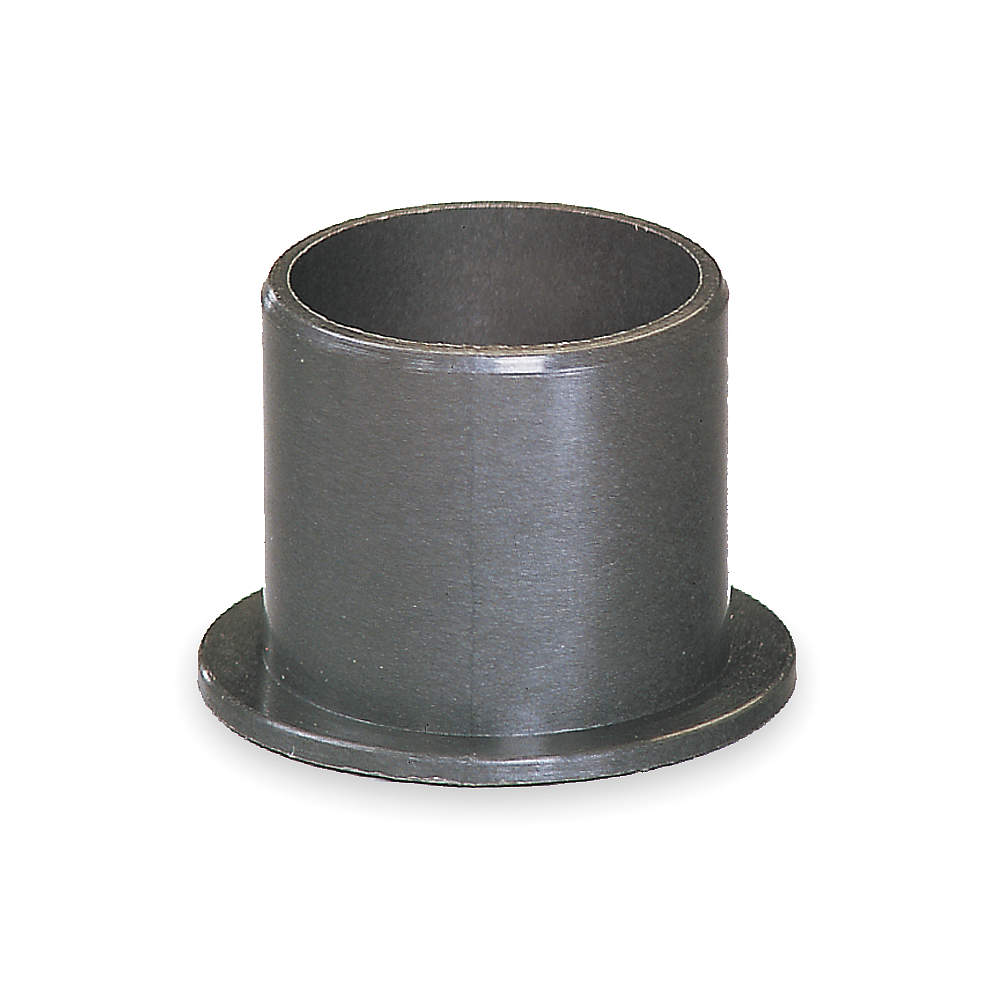
Next up was finding nylon flange bushings and washers to ensure smooth articulation at all of the joints. I required two sizes, 3/8" inner diameter and 5/16". The 3/8" was pretty easy, manufctured by Hillman and available from multiple vendors on Amazon. I cheated a little and searched a couple Amazon vendors and found I could save a bit by ordering direct from a vendor. The 5/16" flange bearings were a little more difficult to track down for some reason. I ended up ordering from W.W. Grainger and saved shipping by picking up at a local branch. The 5/16" were imported from Germany. I thought we could make that stuff here.

Hillman 58069 3/8" Nylon Flanged Bushing (16 ea)
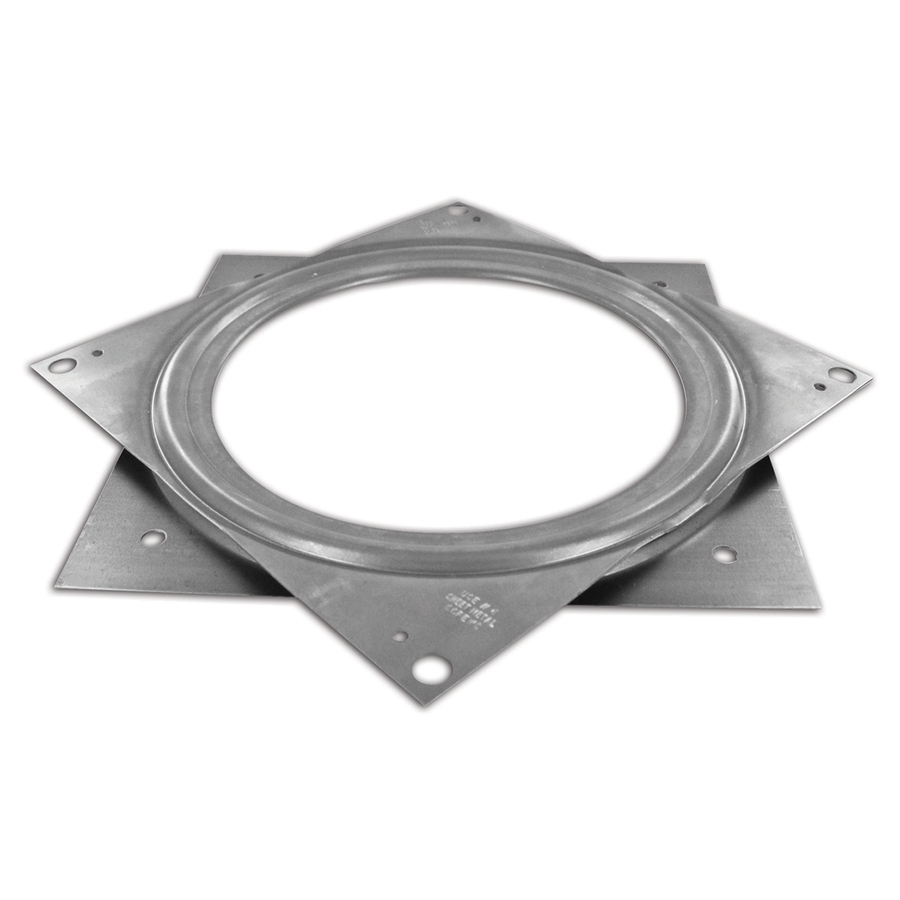
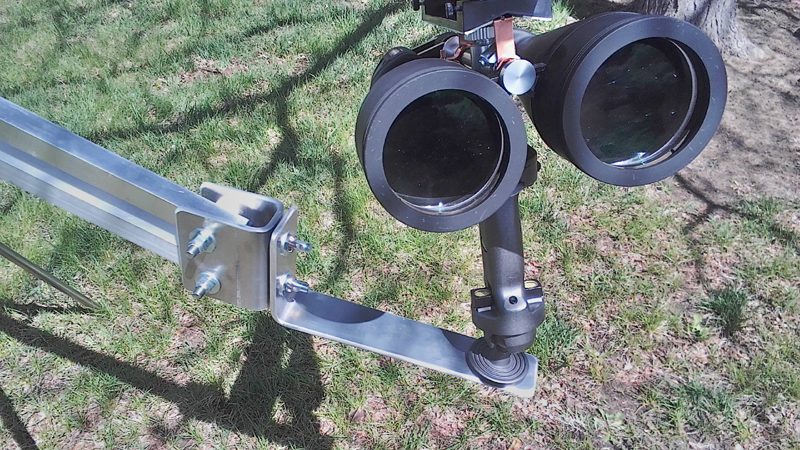
The plan called for a ball bearing lazy susan swivel to rotate the large binocular cradle on its support bracket. This is a 4" square model and it can be found locally at hardware stores. The prototype cradle is finished using this swivel and I'm not entirely satisfied with the results. I've since invested ($35 + shipping) in a 12" x 12" x 1/8" sheet of virgin PTFE, also known as Teflon. This is the preferred bearing material of amateur telescope makers constructing Dobsonian mounts for reflector telescopes. The redesigned mounting system for the tripod is going to be Teflon based. I may eventually also retrofit the cradle bearings with Teflon. I purchased much more PTFE than was required for this project, but I will need more for future projects.
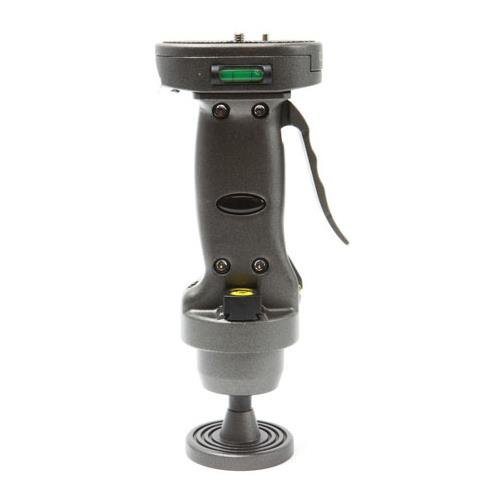
$40 on Amazon Prime gets you a
Dolica G100 Pro Level Gun Grip,
Grey, compact
This is a great little ball head camera mount, the standard 1/4"x20 tpi top
fitting works with most binocular adapters. Hold the trigger down and find your
target with the binoculars. Let go and the binos are locked in place.
Much handier than trying to twist knobs and hold your view steady at the same
time. I couldn't find a load capacity specification, but user reviews
reported no problems with 4 and 5 pound camera setups. I tried the mount
with my 20x80 Zhumell Super Giant Astronomical Binoculars (that's a mouthful)
which weigh in at about 3 pounds. The ball mount works great, easy to aim
and when you release the trigger, those big binos are locked in .
Remember, I'm building a two-headed monster and this mount is for the
small end.
The cradle on the big end is designed to support a 10 pound pair of 25x100 binoculars.
This page updated 11-5-17 Additional notes may follow